Installing TDS to a new (non-default) Website in IIS
The steps below cover moving TDS from a standard "Default Web Site" IIS installation to a new non-default website in IIS.
Before migrating TDS from one website to another it is recommended to:
- Export the current TDS configuration to a seed file (see migrate TDS configuration store docs)
- Make a backup of the current application and data
- Completely uninstall all Rizing Geospatial products from the respective web server (see uninstalling the application docs)
Steps:
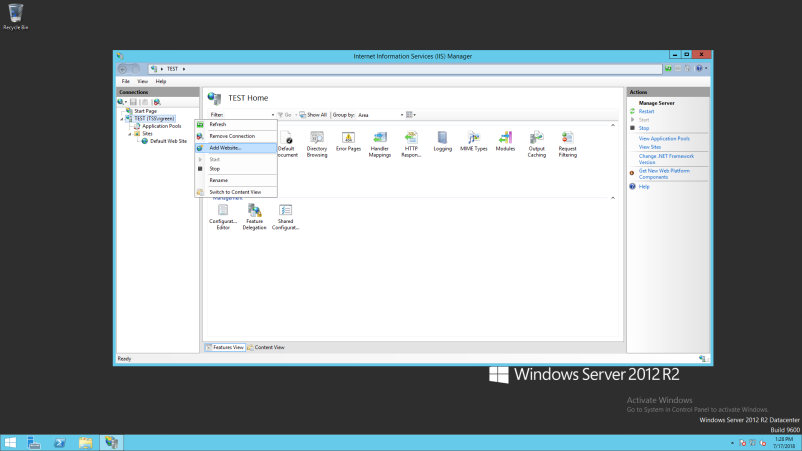
- Create a new website in IIS if it does not already exist.

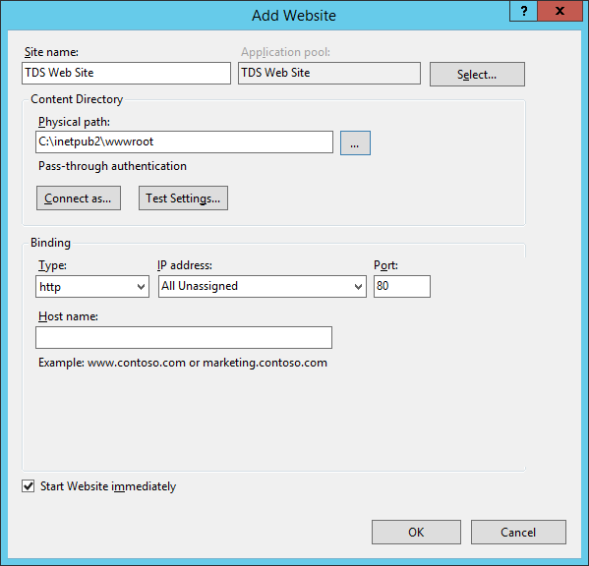
- Fill in site details.

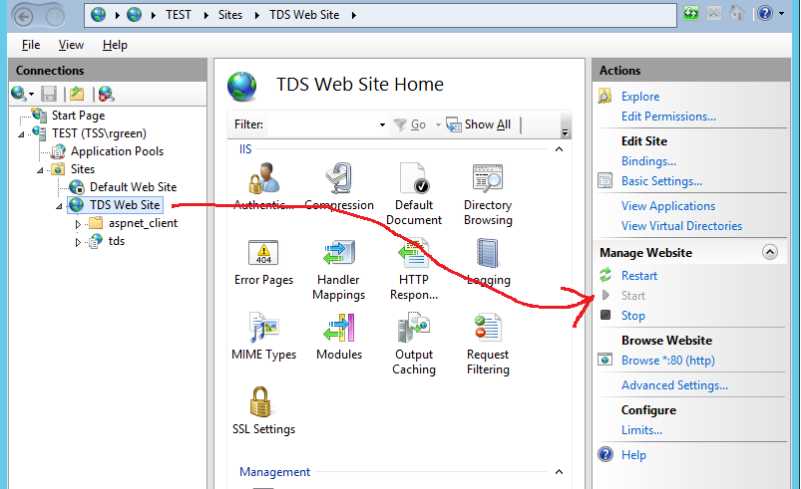
- Ensure that the site is running.

- Run the TDS Installer (for the latest TDS release).
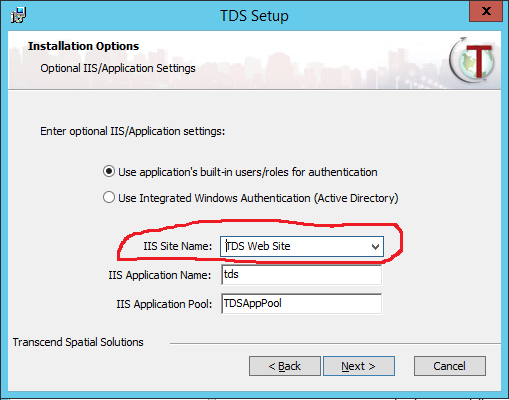
- On the “Installation Options” wizard page, select the desired IIS Site Name.

- Run through the remainder of the installation wizard steps and complete the installation process.
- Once the installation is complete, the application should be installed within the selected IIS Site.
- View the applications listed under the selected “IIS Site Name” to verify.
- Install any remaining Rizing Geospatial products on the server (example: Road Analyzer, Segment Analyzer, etc).
Once the new website is installed correctly, import the exported seed file (from the previous website) to the new application which will restore TDS back to the previous site’s application configuration.
